

Introduction
Creating a new project from scratch is great if you are learning how to build each and every step of the project, or you enjoy the magic of typing "Flutter Create" to the terminal and watch the project building itself.
In most cases, the default "Flutter Create" is not enough for starting with some features that are essential for building a project such as state management & HTTP request packages, databases, folder structure, routing, endpoints, and so on, Therefore If you already know a concept and move on to the actual building part, then starting with a boilerplate project is an effective and time & effort saving way of kicking off your next big idea much faster and probably much more stable.
Note: This template is suitable for relatively larger projects. The state management tools used in this template are MobX & Provider. If you are not familiar with these tools, there will be an example implementation, and you can find the documentation in the article. Nevertheless, you can still use this template for smaller project or practice purposes and customize it with your own packages and state management tools of your liking.
Clean Architecture
Before moving on, it is fundamentally necessary to understand and use clean architecture principles with this boilerplate. Then again, it is most likely necessary to use clean architecture in almost every project.
The reason is that clean architecture divides the code into individual layers.
But why is this so important?
Let's say you want to refurbish your house. By separating the tasks into layers, you do not have to wait for the furniture to arrive to paint the walls, or when you have a problem with changing floor tiles, the painted walls will not be affected by this problem.
In a sense, it protects the project from the developer and helps developers to work together simultaneously.
Besides, once each section functions independently of each other, our code becomes:
- Easier to modify
- Easier to test
- Easier to detect bugs & errors
So... How do you divide the code?
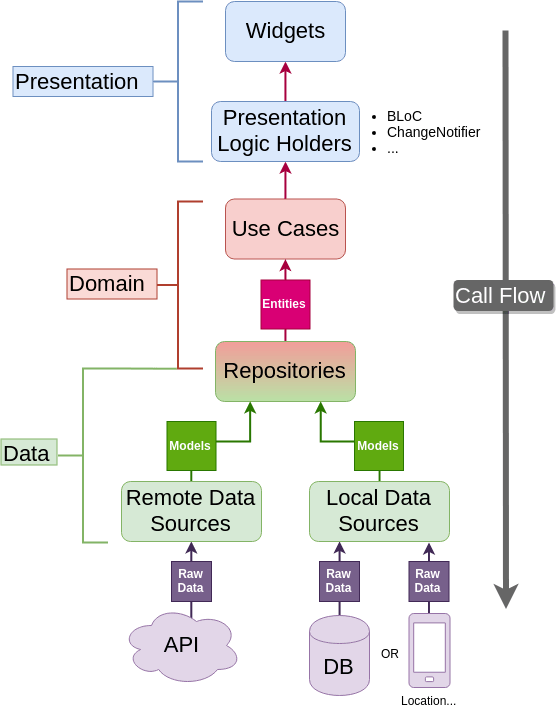
There are three main categories in a clean architecture structure;
- Data ⇨ Local and / or Remote(API) data sources
- Domain ⇨ business logic(use cases) and business objects(entities) to modify or shape the data source
- Presentation ⇨ How modified data source is shown to the user
Reso Coder created this exceptional Flutter implementation and visualized it with a graphic called Reso Coder's Flutter Clean Architecture Proposal™.
Plus If you are interested in detailed clean architecture information, please see Robert C. Martin (Uncle Bob)'s article. In the end, if the concept is still unclear, the example implementation will make sure to take you through each layer of real-life usage.
Setting up the Project
Let's begin by fetching the project from GitHub and install it to our local repository.
Note: We will only go through the mobile version of this boilerplate.
1. GitHub Setup:
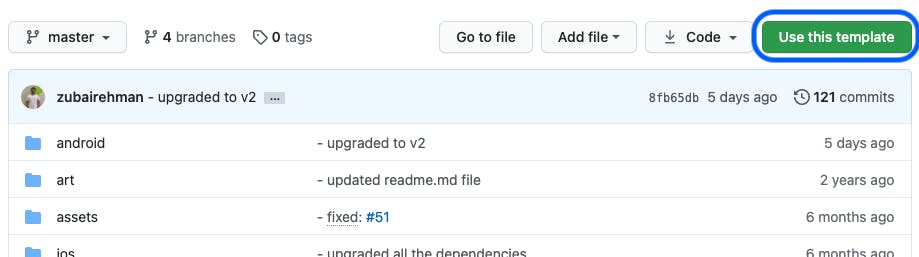
Let's head to GitHub boilerplate repository.
Press "use this template".
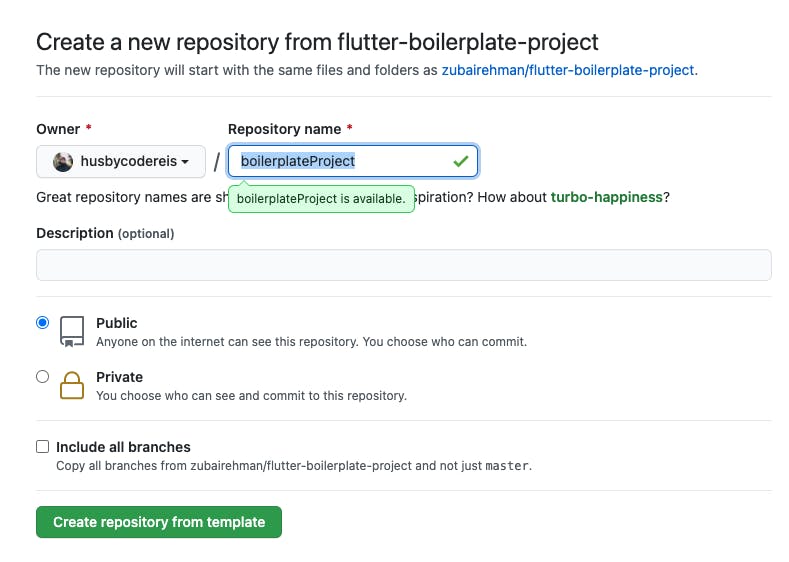
 Name your repository and press "Create repository from template"
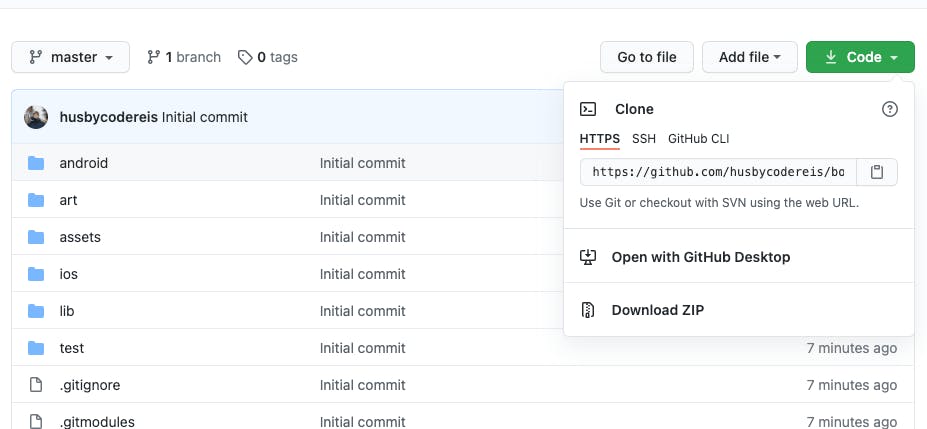
Go to your created repository, press Code and copy the URL link
2. Cloning Repository into a local directory:
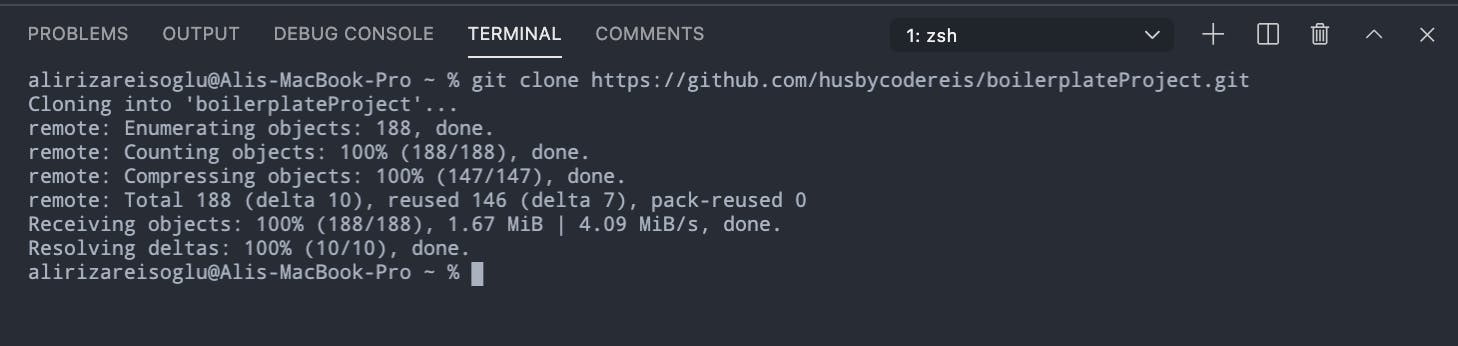
Open up the terminal either directly from your operating system or from your text editor and type;
git clone <your copied GitHub repository>
if you want to clone into a specific folder
git clone <your copied github repository> ./Folder1/Folder2
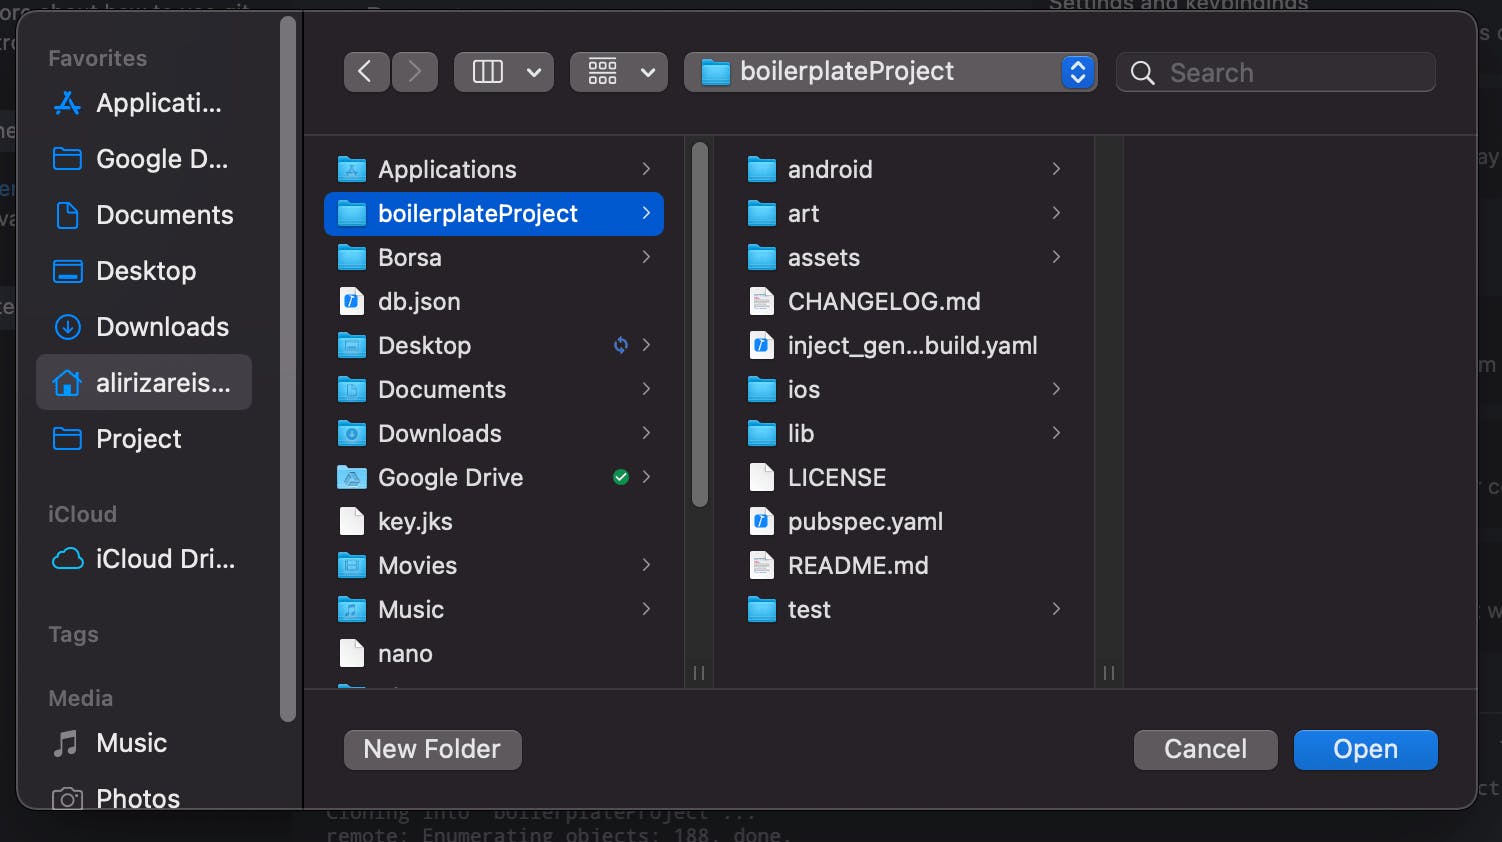
Lastly, open the project folder from the text editor.
3. Getting packages and code generation:
First things first, let's get the required dependencies for the project.
Open up the terminal. By default, most text editors start the terminal inside the project directory.
If not, first head to the project directory,
Next, enter the lines below.
flutter pub get
Note: If you get an error similar to the error below, make sure to switch your channel to flutter channel stable and run flutter upgrade command afterward.

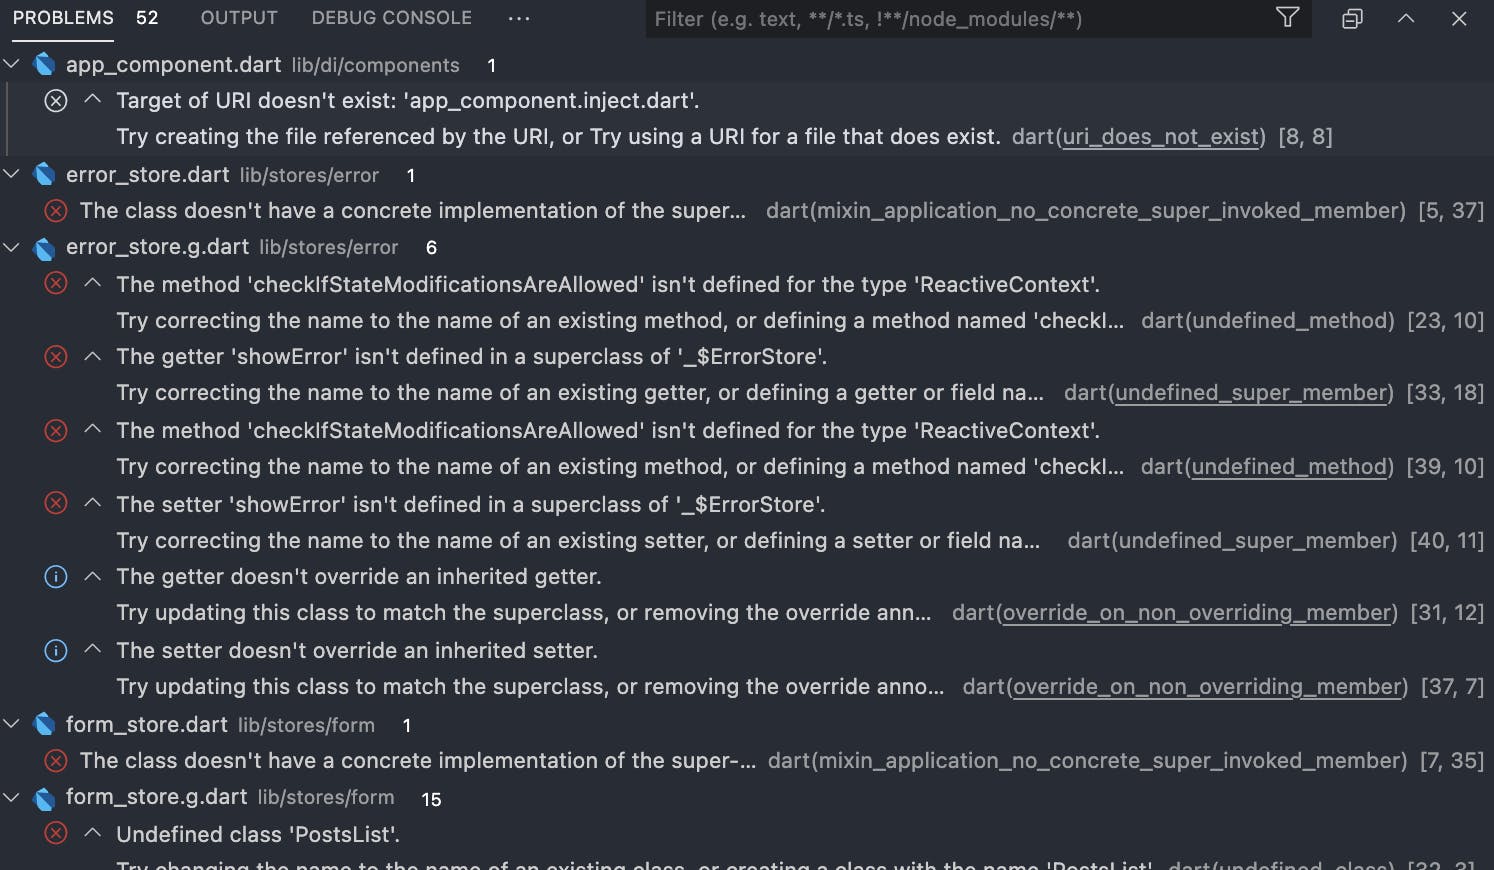
After the packages are fetched, you will see numerous problems flashing in front of your eyes such as;
Target of URI doesn't exist: 'app_component.inject.dart'. Try creating the file referenced by the URI, or Try using a URI for a file that does exist.
Relax, it is totally normal. The reason is that some packages depend on code generation.
Now we are going to run build_runner which will generate the necessary code for some packages to work, and we will see all those errors fade away one by one.
flutter packages pub run build_runner build --delete-conflicting-outputs
By now if you did each step right, you should see that all errors have disappeared, leaving with some warnings. Fortunately, they do not affect compiling process anymore. These are warnings to point out some unused or duplicate features.

These warnings can easily be fixed by clicking on the bulb right next to their description, or they can be left ignored if you do not mind having them at all, but it is always preferred to keep the code clean and simple.
Note: In Visual Studio Code, it is possible to hide generated files for easier folder management. In order to do that;
navigate to Preferences ⇨ Settings and search for Files:Exclude. Add the following patterns:
**/*.inject.summary
**/*.inject.dart
**/*.g.dart
Alright, that was all for setting up. Now let's take this project for a ride!
Boilerplate Features:
Before moving on, it is crucial to take a look at the original documentation for understanding the boilerplate template features and folder structure.
There are a variety of features within this boilerplate. They are all explained in their original documentation. It is up to you to whether keep it, replace it or delete it from your project.
Splash ⇨ First screen when the app launches.
Login ⇨ Login screen with ready-made UI layout
- Home ⇨ First screen to navigate to after logging in
- Routing ⇨ A collection page to store all routing screens for easier Navigation
- Theme ⇨ Dark and Light theme available for use
- Dio ⇨ HTTP request package
- Database ⇨ Sembast
- MobX ⇨ State Management
- Provider ⇨ State Management
- Encryption ⇨ encryption and decryption for String/Uint8List
- Validation ⇨ String validation and sanitization for Dart
- Code Generation ⇨ Generating necessary code with build_runner
- User Notifications ⇨Shows notifications, errors, problems as Flushbar
- Logging ⇨ Flogs
- Dependency Injection ⇨ Compile-time dependency injection
- Dark Theme Support
- Multilingual Support ⇨ Localization support for the languages of your choice
This boilerplate template is made by Zubairehman. All credit goes to him for preparing an exceptional starting point for a business level Flutter projects.